Tuesday, April 9, 2013

More Wine Stoppers & photo hints

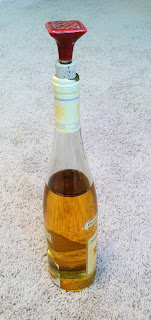
So I seriously cannot quite stop myself from making these.  Thankfully I am out of corks for a while yet.  I knew that I needed to take more and better pics than what I had before (phone quality versus camera with photo edit quality).

 Before I had taken a group shot of them, but in a white box instead of this clear, acrylic wine glass.  Also, since I took the latter picture outdoors, the colors look better and were easier to adjust to more realistic colors.  I took pics on the perfect day, it had been sunny out, but the clouds rolled in so had just the right amount of coverage.
=  


Previously, I was desperate to share with you, so I took pics in a spare bedroom.  The carpet is a great neutral color (great for carpet, not the best backdrop in this case.)  I think that the contrasting background helps the colors pop better (the background is my patio - concrete stained and stamped to look like wood)
 

I also got to group the items a little more creatively when I was outside (I took my time instead of rushing).  This allows better color combos as well as provides greater interest rather than having only the same "poses" over and over again.


I also found that the distance shot of the bottle was MUCH better, cuter, and had far more interest than my inside distance shots!


Good photos can make or break a post, but also an etsy sale!!  Feel free to check out the SHOP section of this blog to see which wine stoppers on in my etsy shop.


Wednesday, April 3, 2013

Hostess with the Mostess - wine stoppers


While I'm not the greatest hostess, I do like to try new, cute projects for such occasions.  Every once in awhile I will pull them out at a party and use, but I am generally just as likely to give them to a host/hostess when I go somewhere or maybe even sell them to friends to do the same.
I did this around Christmas time this year, selling wine bottle koozies as the local handmade store and ended up at a party where three of us brought the same koozie!  I laughed for awhile on that one.  Thankfully I rarely make more than 1 or 2 patterns with the same fabric, so at least they were a bit different!
I still need to work on updating my koozies to include a carry-handle, but in the mean time, I created some bottle stoppers.  I have looked for wine bottle stoppers for awhile - and found that while there were lots of cute options, they were all EXPENSIVE!  Even ones with cork bases (which were hard to find) seemed high.  So, I made some.  Easy Peasy task!


I went though my saved wine corks to find the ones that were tapered (the non-tapered ones are just too difficult to get back in the bottle.  (That was my test - I had an empty bottle on hand and used the ones that I could get back in the neck).  After I found this worked and I wanted to make more, I just couldn't keep up on drinking enough wine :)  I ended up buying some #7corks to supplement this latest obsession.
I went to the local crafty shop and found vintage looking drawer pulls.
Two options at this point:
1) get hanger bolts (looks like a screw with the head cut off, although if you look close it has a sharp side and a flat tip side with threads going in opposite directions) from your local hardware store.  I did this option first.  I used the pointy side down and used a pair of pliers to turn the threads into the cork.


2) After I got these new corks, I found they were too short for the hanger bolts I bought.  Because I could not seem to find any of the diameter that I needed that were under 1", I ended up using a hack saw (shhh, don't tell my hubby that I hijacked his from the garage) to cut off part of the threaded dowel that came with these knobs.


Finish turning the threads until they are all the way down (careful not to go through the bottom of the cork depending on how long of screws/bolts you use) and VOILA.  You have yourself a custom, adorable wine stopper for MUCH cheaper than you could buy.
I did notice that most places that sell them use the stainless steel stoppers (the cone shaped ones that have the rubber rings).  Those are of course more expensive to buy than corks, but can be done.


I now can't stop myself. More knobs, more corks, more wine must be drunk to keep up!!


More pics to come.


Tuesday, March 19, 2013

Houndstooth Happiness

Houndstooth Happiness Quilt

I LOVE this quilt pattern!  
I like the challenge of being able to look at a quilt and being able to re-create the pattern.  
This one however, I did not.  
I got the concept of how it was pieced, but was unsure of sizing.  This pattern is created by Vanessa C. over at V and Co.   Seriously AWESOME quilt!  I have seen it done in so many different colors! 
I found this fabric (when I was NOT looking for fabric for me  - I was at the store helping my mom pick out fabric) and HAD TO HAVE IT!  I LOVE polka dots - they end up being gender neutral in my opinion between the color/pattern.
I always struggle with what to do on the back of quilts.  I almost always make quilts over 42", so I have to figure out how to piece the back in a way that does not look like I just added a swatch of fabric to the side.  This one turned out even better than I imagined thanks to the print.  The frames on the back are pieced with some leftover fabric from the front around small rectangles of the background fabric.  Because the print is so busy, you don't see the piecing between the frames or from the frames to the swatch on either side.  I actually think this adds just enough interest to the back.
I was unsure of quilting on this pattern.  I thought about doing it on my regular machine outlining the houndstooth shape to accentuate it, but decided it was just a little too big for easily rotating the fabric.
So, I took it to my lady.  She lives a bit from me, but it is SO worth it!  In fact this last time I mailed her 4 quilts to quilt and she had them sent back to be completed within about 5 days!  I like that she can do an allover pattern to add a bit of interest.
I am just loving this quilt!  I smile every time I see it.  I actually got the fabric and pattern with the idea of a baby shower gift, but I decided to make it bigger than I normally would for a baby quilt.  Also, I just think it turned out so sophisticated that I don't think it would need to be relegated to baby.  I think this would work for an anytime quilt (including just a throw for a living room!)

GOOD NEWS!  

This quilt is for sale in my Etsy shop.  You can access it by going to the SHOP page here on my blog, or going to MillieSews on easy


Thursday, March 14, 2013

Two Faced Green and Blue Quilt

I love two faced quilts (what I have previously referred to as "trunked pieces")  I tend to make the equivalent of two quilt fronts, but use them as the front and back of the quilt.  I like the idea of a reversible quilt.  This was based off of quilts I have seen pictures of.
One other thing you should know about me, I find it entertaining and challenging to try to look at a picture of a quilt and try to replicate the pattern without a pattern.  This works out better some times over others.  This is an example of when things worked out pretty well.
 The actual "front" of this quilt was based from a post I had seen at Crazy Mom Quilts some time ago.  I had it pinned on pinterest for a time before I attempted it.  I was waiting and collecting various green fabrics just for this purpose.
 The "back" of this quilt - turned out equally cute in my opinion.  It was based on a French Braid pattern that I saw in this Pinterest picture.  Although the link seems to go to nowhere at this point.  Good thing I like to wing patterns or I would still be looking longingly at that picture.
 I wanted greens, but also had originally had blue accents in my living room so wanted to have a stripe or two of blue to make it fit with my room.  Since the original fabric collecting, I changed my couch to a dark brown and new accent color in my living room.  The blue no longer goes (I now have a mustard yellow as accent).  I made the quilt anyway - I already saw it in my mind, so I had to make it knowing it wouldn't match.

 If you only see the couch it still goes, but that is also why I cropped out most of the rest of the living room in this picture.  I still have not invested in my own long-arm quilter (someday, ahhhhh, someday), but the lady that I use when quilts are bigger than a throw, did an allover leaf/loop pattern.

Good news!!  This quilt is for sale over at my Etsy shop: MillieSews

Check it out at the SHOP page of this site, or click the link above for my etsy shop.  Pass along if you think you know someone with a green/blue color scheme!


Tuesday, March 5, 2013

Foreshadowing

No Apologies (I always groan when I read them about this topic), but clearly I haven't blogged in awhile.  I'm going to try to get back into it some.  Since my bloggy leave, I've been working on a variety of projects that I plan to write about sooner rather than later.  Stay tuned :0

A preview of some recent projects that made me happy:
dry erase labels

The "UNpaper" towel sets

Quilts: 
Two Faced (because I keep making two fronts of quilts and using them as front and back)

and Houndstooth Happiness Framed 


Friday, May 25, 2012

Wedding Season - Clutch Edition

It's wedding season!!  So in my last post I blogged about my shoes for the upcoming wedding.  I also started making clutches.  I actually have made about 15 of these lately, but I think this is the one I will take for the wedding night (not sure which one yet I will take for rehearsal)
I ended up using the wrong side of a silky print, plain black as it had just the bit of texture (and I didn't end up wanting the shiny) for the outside and a silky print multi-color feather print for the inside.  Obviously with the flap up you see the pop of color, but when closed, all you see is a barely there hint of color.  
This clutch is an easy, afternoon project.  I'm including a tutorial for it - although I took process pics with a different set of fabrics.  I also ended up adding a magnet closure to the evening clutches, and I had not to the day clutches.  It stayed closed fairly well even without the magnet, so either way should work.

Tutorial
Needed: 
  • (2) coordinating fabrics.  Minimum is 10.5"x18", although I had a larger swatch of fabric so I ended up adding an optional pocket for the inside.
  • firm, iron-on stabilizer (I used decor-bond)
  • thick craft backing (honestly, I no longer have any idea what this actually is.  I bought it next to the stabilizer, but it is thick - like 1/8th inch thick.  It is fusible on one side, but I didn't use that property.) 
 Fuse firm, iron-on stabilizer (decor-bond) to the wrong side of each fabric.  Cut to 10.5"x18".  If you have any fabric left, you can cut a 4.25"x6" piece from each color for the inside pocket.  At one point I used the entire leftover piece and made a two inside pockets - up to you how much organization you will want.
 Inside pockets: If you are going to create pockets, fuse stabilizer to the back of these pieces too.  Layer the fabrics Face to Face (F2F - meaning right sides together).  Pin and sew using a 1/4" seam.  I left a three or so inch opening for turning the pocket.  I like to do this in the middle of the long side, but I know others have preferences such as leaving one entire side opening - up to you on that one.
Trim the corners being sure NOT to cut any actual thread (this will allow better corners when turning)
Turn right-side out through the opening, press with iron, turn in the 3" opening and press.  I didn't sew this separate (although you could), instead I pinned to the inside layer of clutch and sewed three sides (sewing closed the opening).

To get this to work out correctly, I centered pocket about 9" from the bottom.  Be sure one of the sewn edges is towards the top of the clutch so the pocket top will have a finished edge.  Attach sewing only the three sides to be sure you have a pocket and not just a swatch of color when you are done :)
 Layer the two big pieces of fabric F2F (right sides together).  I pin a section of this just to be sure.  I measured about 5" down from the top and used my square and triangle to cut an angle in the flap (this part is totally optional and you could also cut a rounded edge or even leave rectangular based on what finished look you were going for.)
 Pin the entire rectangular shape, leaving an opening for turning.  I again prefer the middle of one side and left an opening about 5" wide.  Sew using a 1/4" seam.  Trim corners and turn right-side out.  Iron wrinkles out and iron the 1/4" seam for the opening.
Before you sew anything closed, this is your chance to add in the thick stabilizer.  I cut a section to 6"x10" and slid it in through the opening.  I wanted the "back" of the clutch to be the sturdiest, so I added it to the middle section - just below the start of the angle.

Take the bottom of the clutch and fold onto itself until just below the angle of the flap.  Pin in place.

Sew (I used my walking foot - typically for quilting - as it handles bulkier items better).  I used about 1/8" seam on all sides except for the bottom fold.  Be sure to backstitch a few times on the points most prone to pulled stitches - where the bottom meets the top.

Iron one more time and you're all set!!

Carry with flap out or flap tucked in...Endless color combos...I'm addicted - of course!

Linky Party for Your 'Final'ly Friday projects.


Related Posts Plugin for WordPress, Blogger...